Help Center
All of our best resources, right at your fingertips.
Measuring Your Custom Box Design
To provide you with the best possible fit for your custom mailer or custom shipping box, it is essential to find the correct measurements based on your product and how you hope to ship it. The process begins by determining the necessary length, width and depth of both your product and its packaging.
Once you have the appropriate box design dimensions, you can generally add 1/16” (or 1.3125) to come up with the perfect measurements for your custom retail box! Of course, each product will have a unique set of dimensions that you’ll have to keep in mind when preparing your custom box design, so here are some examples to consider.
Rectangular Object Measurements
For rectangular products that can shrink or otherwise change in size, it is best to measure the object after shrinking to ensure that you find the appropriate item size. The ideal way to measure your rectangular product is to follow these instructions:
- Place your product in front of you the way you would have it displayed on a shelf. You find the length by measuring the distance of your product from left to right.
- Your product’s width is found by measuring its distance from front to back. Make sure to measure across the side panel of your product’s packaging.
- Measure your product from top to bottom to find its depth. As with the length and width, remember to measure as if it’s on display on a shelf.
Cylindrical Object Measurements
Measuring a cylindrical object is a little easier as you’ll only have to measure two dimensions on your product: the diameter and height.
- By finding the object’s diameter, you’ll have found its length and width. Just place your product as you would find it on a shelf and measure its distance from left to right.
- Measure your product from top to bottom to find its depth. As with the diameter, remember to measure as if it’s on display on a shelf.
PRINTING METHODS
We use three different print methods to apply to your box:
FLEXOGRAPHIC PRINTING
Flexographic Printing is the most common way to print your box (normally 1-3 colors) and is perfect for simple logos and artwork. This process requires print plates that are similar to rubber stamps that apply ink directly to the print areas.
DIGITAL PRINTING
Digital Printing is commonly used for short runs and prototypes. Corrugated sheets are run through a large four-color process printer similar to your desktop printer. This is a slower process that could be more costly.
LITHO LAMINATING
Litho Laminating is where a full colored, photo quality label is printed and then adhered to the corrugated board prior to making your box. This process is used when a high quality printing process is required.
COLORS
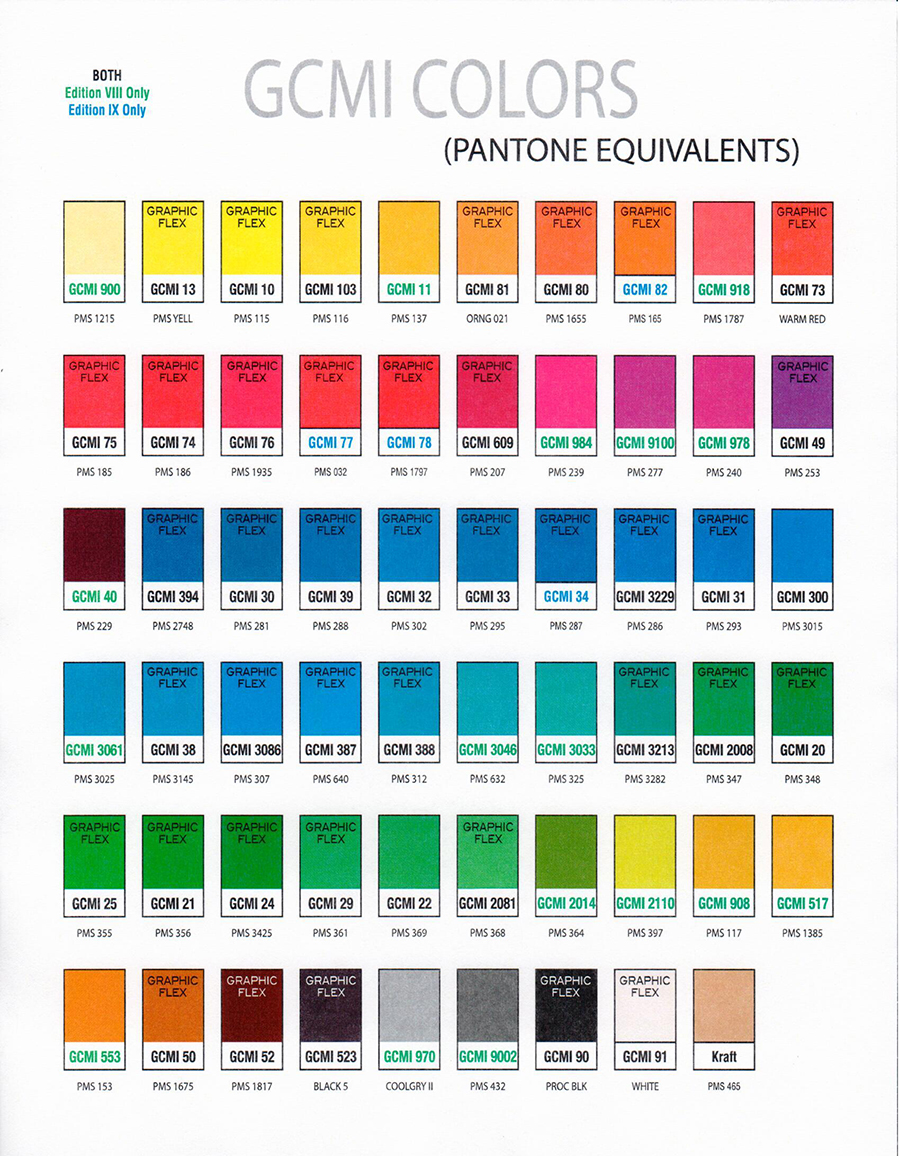
GCMI ink is the standard ink used in the corrugated industry. You can see the standard ink color chart by clicking the button below. A PMS color can be matched with this ink for an additional charge.
Not all color formats are the same. When creating artwork, it’s important to convert your colors to CMYK. Colors that are RGB (this is often the default) won’t match the colors used in the printing process. By converting to CMYK, you’ll have a much better idea of what the final product will look like.
FILE FORMATS
We require a vectorized file. Your file needs to be “workable” as we often need to resize and split apart your graphics in order to ensure that the design is centered to the panel that the design is printed on.
Additionally, images that are not vectorized will distort if they need to be blown up to the appropriate size.
Please make sure to outline all your fonts and save your artwork in either EPS, PDF or AI format.
FONTS
A font that is legible on your monitor may not be on your box. Try to keep your fonts larger than 9 point and avoid script style fonts as much as possible so that your text is sharp and crisp. Cardboard tends to absorb ink and will distort smaller or more intricate fonts.
DIE LINES
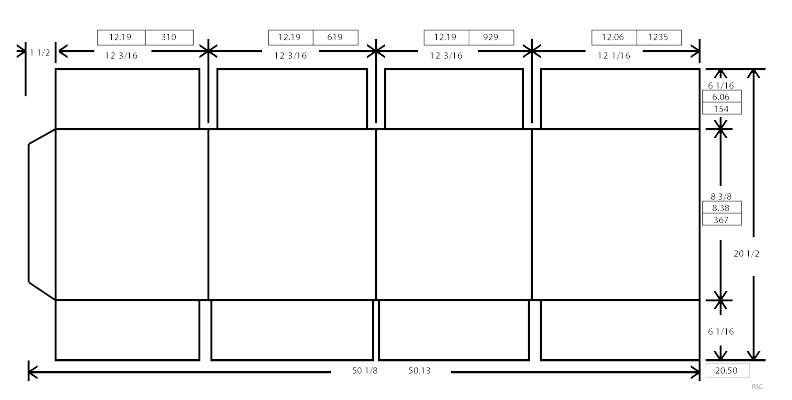
Once your sample is approved, we will send you the dieline. We ask that you or your graphic artist place your artwork on the dieline using a separate layer. Please add a 1/4” bleed to your cut lines. Additionally, if your job is being printed with our flexographic method, the print should be an ⅛” inch away from score lines.
Why Choose Build A Box?
Build A Box has successfully worked with businesses and consumers for the past 25 years in creating custom box designs that fit any requirements for branding, safety and aesthetics. Our dedication to bringing our client’s vision to life by using the best products and practices available has allowed us to become the best option for all of your custom printing needs.
If you’re ready to get started designing your custom box or display, one of our expert designers will work alongside you through the entire process to help you create the perfect custom box or display for your business’s needs. If you already have a design in mind, our free online configuration tool allows you to submit your custom creation and receive a free quote with no hassle.
